Players who want to "go pro" in the Hi-Rez MOBA Smite need to master the intricacies of the Conquest Mode. In this mode, players get assigned to teams to dish out some good ol' 5-versus-5 tactical fun. Essentially, Conquest Mode has Smite's unique take on Towers, Jungle Camps, and even the many elements that interplay whenever the players' Gods encounter one another.
RELATED: 5 Reasons Why Overwatch Dominates The MOBA Scene (& 5 Why Smite Is Better)
For instance, Smite's Conquest Mode has the Role Call System that allows players to "declare" the Role they will have for that current match. However, MOBA fans might realize that Smite's Role Call System has more intricacies than they realize. Newcomers might find this system overwhelming, but this guide will make Smite's Role Call System more understandable.
Before players get into Conquest Mode’s various Roles, it’s important to have a general idea as to why these Roles matter in the first place. Essentially, they’re in charge of managing what happens in a Lane or a group of Lanes. In Conquest, these Roles help especially when it comes to interacting with the various minions, Elite monsters, and Gods that roam around the battlefield. Here are a basic description of the various Lanes and relevant places on the map:
Solo Lane: The Solo Lane describes the side lane with the shorter side, evidenced by a shorter route between the two middle towers. Due to its shorter nature, it’s highly contested but easily defensible. Its most distinguishable feature is that it only has one Greater Scorpion and a Totem of Ku opposite it.
Duo Lane: The Duo Lane pertains to the side lane with the longer side, evidenced by two Greater Scorpions in between the middle towers. Given their distance, the Duo Lane is highly contested and not-so-easily manageable. Due to this nature, the Duo Lane requires two Gods for conquest - the Carry and the Support.
Mid Lane: The Middle Lane is perhaps the shortest route Gods can take to the enemy base, making it a hotspot for battles. Each side has two Towers extremely close by, with the Phoenix not too far from them either. The midpoint of the Middle Lane has four corners, with each team having access to two that can lead them deep into the Jungle. This makes the midpoint of the Middle Lane very prone to ganks and team fights.
Jungle Camp (Solo Lane): The Jungle Camp beside the Solo Lane has buffs that especially become useful for Solo Gods. These come in the form of adjacent Mana Buffs, Harpies for XP, and highly-contested Fire Giant and a Greater Scorpion. Solo Gods usually retreat into this Jungle Camp to farm a little to improve their potency in battle.
Jungle Camp (Duo Lane): The Jungle Camp beside the Duo Lane describes the Camp with buffs specifically designed to help the Carry. These come in the form of nearby Void Buffs and Damage Buffs near the Mid Lane. There are two nearby Harpy Camps for XP, a Greater Scorpion, as well as highly-contested Oracle Harpies and Gold Fury. ADCs usually fight to acquire these buffs, and they often cross over to the enemy’s side of the Camp to acquire these benefits.
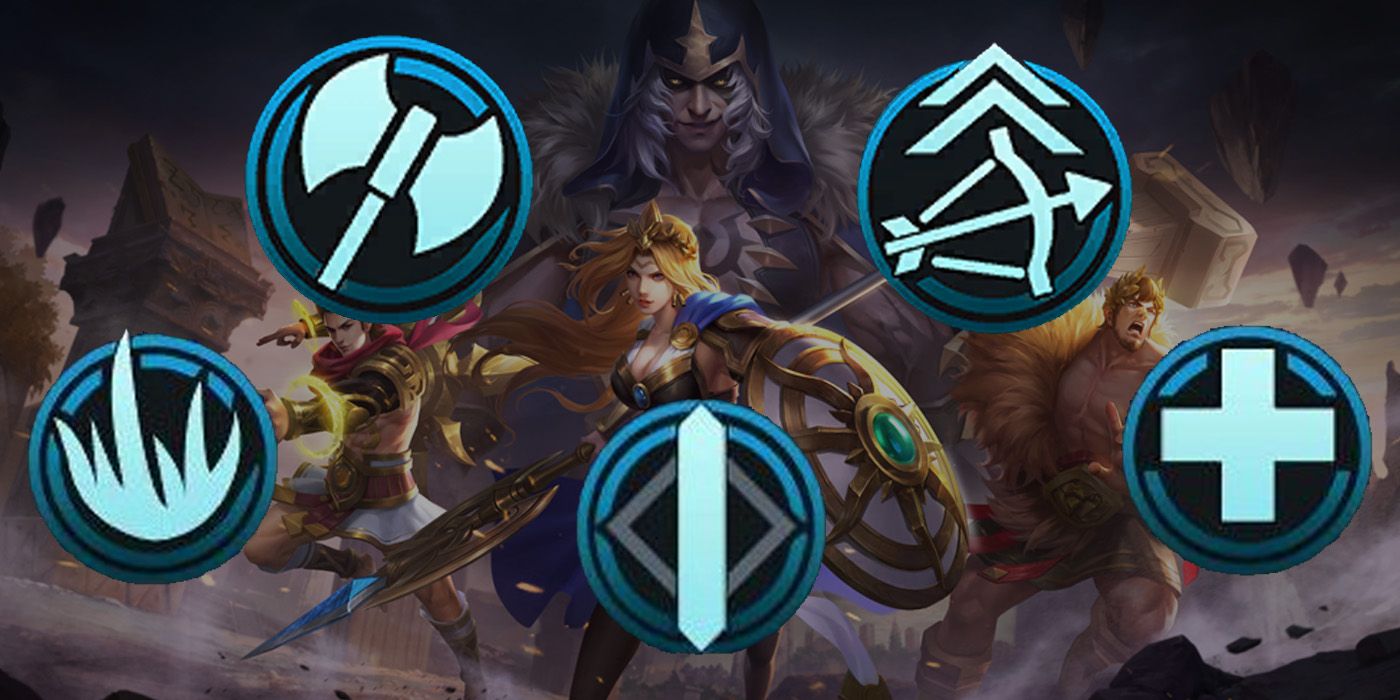
Newcomers might feel confused as to how exactly do the Roles in Conquest Mode differ from the Classes associated with the Gods. As it turns out, not much! In fact, all Conquest Roles almost always correspond to a certain Class in terms of gameplay and expected combat patterns. However, it's understanding how these Roles play out that can help make certain Classes shine in the Role they choose. Here's a quick rundown of Conquest Roles:
Solo: The Solo serves as perhaps one of the most straightforward Conquest Roles out there. Thanks to their balanced stats, Solos can confidently defend and attack the Solo Lane without having to rely on their allies. Most Solos boast decent damage and decent survivability, making them excellent damage soakers that still pack a punch if push comes to shove. They almost always rule melee combat, and they devastate close encounters with their harsh attacks and counters. Due to their need to have a healthy balance between offense and defense, Warriors often take up the Solo role.
Mid: The Mid becomes in charge of defending the Mid Lane from constant enemy assault. Unfortunately, the Mid Lane's precarious position of being in the middle of two Jungle Camps makes them highly susceptible to ganks or team fights from other farming Gods. Thankfully, great Mid Gods often boast devastating areas-of-effect (AOE) and ranged damage that they can often cover more ground compared to their other counterparts. Sadly, their glass cannon nature makes them dependent on Towers and Support for protection - both of which are thankfully more accessible from Mid. The need to dish out heavy damage makes the Mage a great class for Mid.
Jungle: Perhaps one of the most technical of the Roles, the Jungle acts exactly like other Jungle roles in other MOBA. Thanks to their speed and attack damage potential, they make perfect farmers in the Mode's Jungle Camps. Ideally, Junglers have an intimate understanding of the interplay between Elite monster timers and how they influence a God's growth. That way, they can juggle between farming for early-game dominance or outright ganking opponents. Thanks to their mobility and attack speed potential, Assassins make great choices for Jungle.
Carry: Unlike the Jungle's Anti-God and Anti-Elite approach, Carries (ADCs in other MOBAs) have a more timing-based approach to combat. They rely heavily on securing the most buffs and experience from minions, farms, and combat. Unlike Assassins that devastate in the early game, Carries ensures they have just the right opening gambit to secure the endgame. As they're in charge of the Duo Lane, they need to come in the way of their opposing ADC's growth to ensure damage domination. This timing-heavy approach usually pays off, as Carries boast some of the best damage numbers in the game. Due to their damage potential, Hunters usually lean towards this Role.
Support: Backing up Carries are Support, which often comes in the form of defenders that primarily soak up damage and stop the enemy assault. Unlike their damage-heavy companions, Support focuses on keeping their allies alive and keeping the enemy away from the team. They have great damage mitigation abilities, alongside handy utility skills that come into play to help their allies. Given how the Support specializes in defense and protecting their allies, Guardians almost certainly fit this Role perfectly.
However, take note that a God’s Class doesn’t necessarily dictate the role they have on the battlefield. In fact, some Gods have diverse-enough kits that players can have them diverge in other roles provided they have the right builds.
Moreover, some players may be forced to adjust their builds on the fly to accommodate new roles based on the dynamics of the game. Here are some examples of Gods and other options for their roles:
Amaterasu (Warrior): Thanks to her constant movement speed/attack damage buff, Amaterasu can take on most threats. Her dash attack and shield/long-range attacks also enable her to stay on both melee and attack from a distance. In turn, while Amaterasu suits Solo, she can also become a handy Support.
Neith (Hunter): Thanks to Neith’s straightforward kit and ranged abilities, she easily becomes an ideal Carry. However, due to her strength in tapping into her abilities, players can also build her like a Mage to maximize her ability-based attacks. In turn, Neith can make a decent Mid and protect the Middle Lane while invading the Jungle for her farm every now and then.
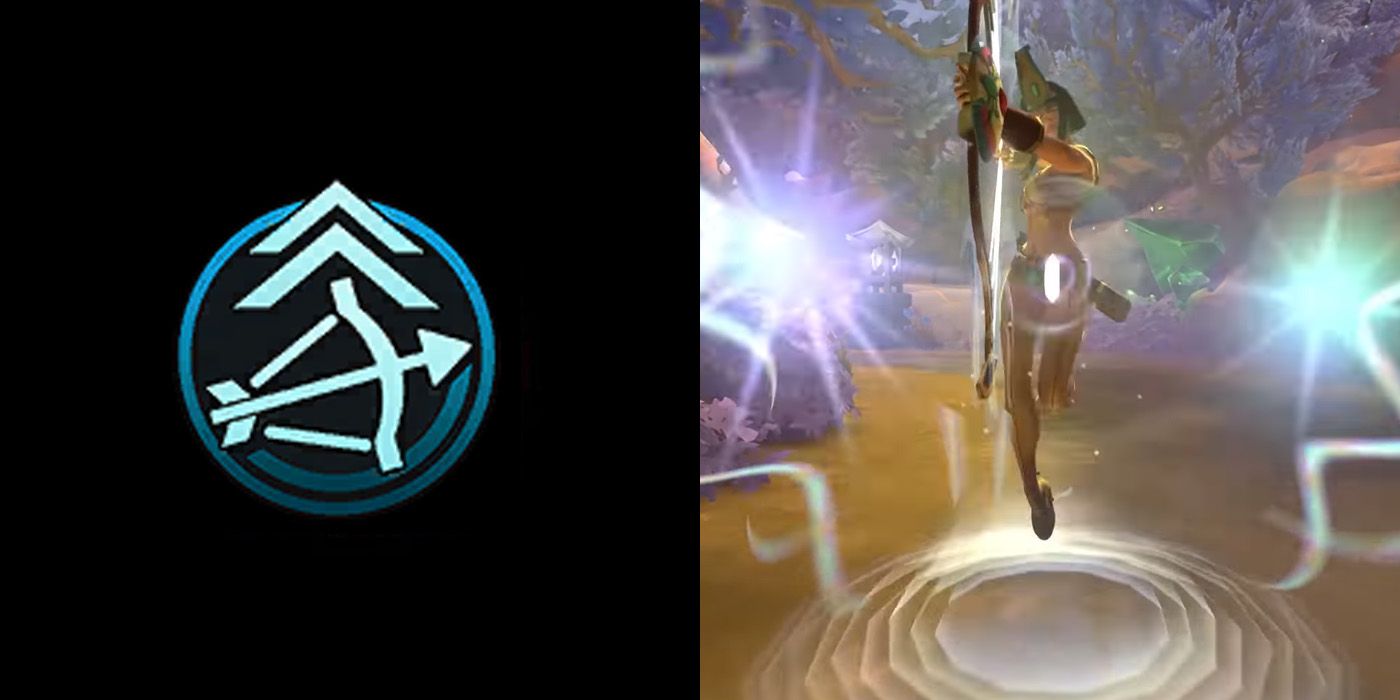
The Carry Role or the ADC (Attack-Damage-Carry) specializes in dealing high amounts of base damage without relying too much on buffs and other tools. Unlike other Roles, Carries can easily devastate team fights with high damage output and often punish the enemy when they get the first shot.
At their core, Carries boast potentially the highest sustained damage output in the game, especially for single targets. They work best in the endgame, especially if they’ve farmed properly in the opening part of the match. Sadly, this timing-based approach makes Carries squishy in the early game, and relies heavily on Support for their preliminary growth.
Of all the Roles in the game, the Carry or ADC is perhaps the one that relies on timing the most. If they farm properly, even their base damage output in the endgame can be enough to clear objectives and kill enemies extremely quickly - thus, “carrying” the team. Of course, newcomers who hear this might easily feel overwhelmed by the responsibility. However, most new Carries should follow some basic tenets to dictate their approach in the match:
Clean and efficient. Unlike the brutally-unfair Junglers, Carries have a more straightforward and efficient approach to battle. Their builds often revolve around enhanced damage, penetration, and attack speed to end skirmishes as soon as possible. They often pick off weaker opponents among the enemy team. Carries should identify whether their build for the match should revolve around penetration, attack speed, life steal, or power.
Patience and scheduling are important. Unlike other builds, Carries pay close attention to the flow of the match. Like the Hunter God Class, Carries strives to ensure that they dictate the flow of the damage output benchmark in a battle. In turn, it’s extremely important for players to stay patient and stay focused on the goal: stick to the endgame. Carries need to avoid death at all costs, and instead retreat when necessary. They need to stick to farming as often as possible while ensuring that their team’s minions stay a threat to the opposing team.
As Carries, ADCs often follow this approach to achieve victory in the quickest, most calculated way possible:
Pressure as early as possible. In the opening, ADCs often chase as to who among them reaches Level 2 the soonest. Theoretically, an ADC’s first and second-level abilities should be enough to pressure a weaker opponent into their tower or into retreating. Once they do this, ADCs can either strike the first kill, deal decent damage to a Tower, or leave to start farming. If they fail to do this, they need to find the best way to get ahead of the enemy ADC in terms of level without sacrificing their lane. In these opening minutes, the ADC usually stays with the Support.
Greed is good before the end. By the time the match gets into the mid-game, Carries will probably see a power spike as the items they build can greatly contribute towards attack speed and penetration. In these instances, Carries should continue to be greedy - in a sense that they should keep on acquiring resources as fast as possible. Carries can start rotating into other Lanes here to assist other Gods, provided they’re on their way to buff as well. Every second counts.
Calculated team fights even in the endgame. Carries should never become careless, regardless of how strong they get in the fight. If they die at any point in the match, the enemy can capitalize on the spawn time for their ADC to regain the advantage. To avoid this, any direct conflict the ADC gets with the enemy should apply a hit-and-run approach. Carries should focus on the easiest targets to kill within proximity.
RELATED: 5 Ways Valorant Is Becoming The Best Hero Shooter (& 5 It’s Still Overwatch)
The ADC usually aims for the Chimera or the Void Buff (purple icon). When fighting the Chimera, Carries should take note of its Void Sludge ability. This debuff forces a 5-percent protection reduction in targets for 10 seconds that can stack up to three times.
However, if the ADC successfully kills the Chimera, it does get a mean Void Buff. This buff applies a 5-percent protection reduction alongside a flat 10 protection reduction to enemies within 55 units. Moreover, the God with this buff gets a 10-percent increase in attack speed. In turn, the Void Buff easily becomes a must-have to eliminate Jungle targets quickly and dish out mean damage to opponents.
Players who want to go for the Carry role should pick Gods with a flexible-enough skill set that allows them to outlast opponents from a distance. However, they should still possess decent range capabilities that let them pressure their opponents in the lane and even eliminate heavy damage dealers in team fights. Here are some recommended Carries:
Medusa: The Gorgon Queen packs a mean punch on the get-go, with her Viper Shot (S1) allowing her to deal damage over time. Moreover, her Acid Spray (S2) and Lacerate (S3) deal extended damage or rooting to opponents, respectively, giving Medusa a lot of room to dish out her combos. Her Petrify (Ult) can also freeze opponents in place, perfect for escapes or quick kills.
Jing Wei: This God easily becomes a player’s top ADC choice due to her mobility options. Persistent Gust (S1) gives her a knockdown ability, while Explosive Bolts (S2) enhances her attack options. Agility (S3) enables her to move much faster, while Air Strike (Ult) essentially makes Jing Wei a walking machine gun. Players can enjoy a fast-and-loose approach to combat with Jing Wei, with easy methods of approach and escape.
Gods who specialize in the Jungle oftentimes serve as the deadliest among the bunch. Their abilities aren’t just designed to help them eliminate Elite monsters quickly. Rather, these Gods are set up to eliminate fellow Gods as efficiently and as brutally as possible. Their high mobility allows Junglers to build up damage via attack speed, making them perfect for ganks.
However, Junglers often have weak defenses and can only gain the upper hand if they have a better technical understanding of Jungle Camps and how these can synergize with their abilities.
As specialists of the Jungle Lane, Junglers essentially depend on the various buffs they can find in the Jungle to boost their firepower and contribute to the match. Unlike other roles, Junglers don’t have a “permanent” Lane regardless of the stage of the game, and they often roam around to capitalize on Jungle buffs or eliminate other Gods. In turn, here are some basic traits of the Jungle Role:
Maintain the gank. Unlike other Roles, Junglers have the highest threat to gank due to their expected presence in Jungle Camps. Junglers should always find the nearest buff to utilize as often as possible to maximize their attack potential. Early-game Junglers can secure early kills to help the team dominate the earlier parts of the match. If Junglers do this successfully, they can easily become the most threatening part of a team fight despite their health limitations.
Remember the rotation. Again, unlike other Roles, Junglers often have their special “rotation” to follow throughout the map. After they acquire the Speed Buff, Junglers should go around their team’s Jungle Camps to secure as many buffs as possible. This also allows them to transition from any of the side lanes to Mid Lane, and end on another side lane. Such a strategy maximizes the Jungle’s opportunity to gank and aid the team in terms of laning.
Aside from having a basic rotation inside the Jungle, the Jungler should keep in mind that their presence throughout the game is something the enemy is constantly anticipating. Efficient Junglers maximize this “paranoia” from the enemy team to catch them by surprise:
High pressure in the early game. As much as possible, Junglers should aid in generating as much pressure as possible in the early game. By the time Junglers secure a set of buffs in any of their Jungle Camps, they can proceed to help any lane facing a considerable threat. If done right, the Jungler can score a gank or two and help one Lane proceed further down the line.
Take note of steals midway. By the match’s midpoint, other Gods may have grown considerably - which means Junglers need to focus on capitalizing on their buffs to hinder the progress of the enemy. Likewise, if possible, the Jungler should attempt to steal unsecured buffs from the enemy Camps to prevent the opposing Carries and Junglers from benefiting from them.
Ward against ganks and team fights in the endgame. At this stage, Junglers should also take note of the progress of the enemy Jungler so they can always counter their attempts to gank. Junglers should always keep their Wards activated in spots they can’t always go to in order to determine whether enemies have plans for surprise attacks. In the endgame, deaths mean a minute or so to respawn - which is more than enough time for the enemy team to secure a few useful buffs for a counter-attack.
Junglers need to focus on maintaining their speed, and thankfully Centaurs (the yellow fast-forward icon) can help them achieve the Speed Buff. Accessible Centaurs appear near the team’s base, making them handy resources for the useful Speed Buff. Junglers should take note of the Centaur’s Spear Thrust, as it can deal thrice its basic attack damage to targets within a straight line. In turn, Junglers can easily dodge the Centaur’s heavy attacks by attacking while moving around them.
Thankfully, the Speed Buff that Centaurs provide does make fighting them worthwhile. For instance, the Speed Buff not only gives the Jungler 5-percent movement speed, but it also gives them 10-percent reduction to CDs. Moreover, Junglers that continue to kill or assist in Jungle Camp fights can get up to three stacks of additional 2-percent movement speed, with each stack lasting 15 seconds. The Speed Buff optimizes a Jungler’s path in their team’s camp, making this an ideal starting point for a Jungle rotation.
Players who want to pursue the Jungle should always pick Gods with a knack for deadly 1-versus-1 skills. That way, these Gods always have an edge against specific targets - allowing them to end encounters swiftly and extremely painfully. Here are recommended Gods:
Ratatoskr: Despite his small stature, Ratatoskr makes a mean Jungle thanks to his suppressive abilities. His Passive allows him to get continuous increases in Movement Speed and Power. This works well with all his abilities - which either stun opponents or deals damage in spurts. His Dart (S1) slows enemies, his Flurry (S2) reduces protections, and Acorn Blast (S3) deals burst damage. All these abilities work well with his Ult, Through the Cosmos, which not only damages enemies but also knocks them down.
Thanatos: Thanks to his life steal nature, Thanatos becomes a force to be reckoned with in the Jungle. His Passive enables Thanatos to gain HP whenever he kills Gods and minions, but his abilities now cost HP and MP to use. His Death Scythe (S1) grants life steal and slows down enemies, while Scent of Death (S2) buffs Thanatos’s speed and penetration. Moreover, his Soul Reap (S3) becomes a handy silence ability, while Hovering Death (Ult) becomes a one-shot-kill ability against enemies on a certain threshold.

Unlike other Roles, the Support essentially ensures the survival of their charges - sometimes their teammates, and more often than not the Carry. They fit well with defensive roles thanks to their great health and protections, alongside some Gods that even have great sustainability and healing abilities.
Supports don’t boast a lot of damage, but they have incredible crowd control abilities - making them excellent for team fights. Their low damage output gives the impression that they’re “useless,” but in the right hands, they can essentially devastate a team fight as soon as they make a move.
Of all the Roles in the game, the Support consistently needs to provide protection to their team - regardless if they’re stuck in Duo Lane or if they’re rotating. Due to this, a player’s approach to Support shouldn’t come from “engaging” an opponent. Rather, they need to learn how to buff their allies, debuff their enemies - even learn how to take hits meant for their allies. Here are some basic principles:
Strength in defense. Support players should never get frustrated about their low to middle damage numbers. They’re relevant even in the early game, as their kits are almost always meant to aid allies or annoy enemies regardless of the level. If they think their charges are strong enough to defend themselves, it’s time to aid other Lanes just to make sure their waves at least reach towers.
Health is wealth. In order to take the brunt of enemy assault, Support players need to focus on building as many protections and health as possible. These come in the form of more efficient CDRs, multiple potions, and building CC to restrict enemy movement as often as possible.
As mentioned, Support players have a singular objective from the beginning to the end of the match: protect their teammates. Their approach to this objective can differ depending on the stage of the game, but they often happen in three steps:
Never get the last hit. In the opening gambit, Support players should try their best to let their Carries get the last hit as often as possible. Doing this ensures that the ADC secures as much experience as possible to level up much faster. This strategy also applies when the ADC is attacking Elite monsters, as the ADCs have the firepower to maximize the buffs in the early game. Since Support players often reserve the last hit for ADCs, they should also do their best to annoy the enemy ADC with their CC abilities.
Threaten ganks in the middle point. Once the match gets towards its first 10 minutes or so, the Carry should be able to hold out on its own in terms of farming. This move maximizes the experience gain they get from buffs. Additionally, this strategy allows the Support to roam around the battlefield and assist other Lanes. Thanks to roaming Support, enemy Junglers who want to gank allies can be discouraged.
Protection is the key in the late game. By the time the match reaches its tipping point, the Support might still not have enough firepower to dish out damage against opponents. However, Support players should’ve built their defenses well enough to take the brunt of attacks in team fights. By the late game, Support players should focus on participating in team fights - especially when it comes to giving the team valuable CC support and even taking hits from enemies. This allows teammates to eliminate enemies much faster.
RELATED: League of Legends Wild Rift: 5 Reasons We're Excited (& 5 We're Scared)
Unlike other Roles, Support players don’t really need to “farm” in the strictest sense. They don’t have much use for the damage and speed buffs that most buffs in the games offer. However, they should generally follow the Lane rotation of the ADC for as long as the Support can still head back to the Lane if it needs assistance. Once the Carry clears the first Void Buff, the Support can start farming free Alpha Harpies in the area to gain additional levels.
If possible, Support should try getting Void Buffs and Lesser Scorpions, especially with the Carry. From time to time, Supports can go for both their Alpha Harpy and even these buffs on the opponent’s side, and even help the Carry eliminate Greater Scorpions the first time they spawn.
As Support, players need to find Gods capable of damage mitigation with enough utility to help their teammates in team fights. They need to have a means of annoying enemies enough to hinder their approach while giving their allies enough openings to deal a counter assault. Here are some recommended characters for beginners looking to do this Role:
Ares: The Greek God of War is always a safe choice when it comes to Support. True to his wrathful nature, Ares packs enough punch to punish Gods who dare try to get in his way. His Bolster Defenses (S2) gives continuous buffs to allies, while Searing Flesh (S3) is a damage-over-time that punishes Gods who try to approach him. Meanwhile, Shackles (S1) and No Escape (Ult) give him the opportunity to bind and even drag opponents to his allies.
Ymir: This God hinders the approach of enemies thanks to his affinity with ice and frost. His Ice Wall (S1) lets him summon a literal wall that blocks an enemy’s path. Moreover, his Glacial Spike (S2) and Frost Breath (S3) can slow and stun opponents, respectively. Lastly, his Shards of Ice (Ult) deals devastating damage after charging. Ymir can double as a Solo Laner, should the need arise.
Gods with a knack for dealing heavy damage with their abilities generally fit the Mid Role. Their high firepower makes their presence extremely valuable in team fights, especially as they build their core damage base by the time they reach the late game.
Unfortunately, Mid does tend to be squishy and extremely reliant on their abilities. In turn, players who want to learn how to play Mid properly need to be on the constant lookout for resource management and avoiding getting stuck in crowd control effects.
Due to the necessity for Mid Laners to boast heavy firepower, Mages often fit this role. Their skillset allows them to defend the Mid Lane on their own, thanks in part to the close proximity of powers. Moreover, their reach towards both Jungle Camps allows them to provide much-needed backup for Junglers and Carries eyeing for ganks. This multifaceted nature might make Mid Laners tricky to play, but they generally follow these trends:
Prioritize the wave clear at all costs. Most Mid Laners experience a bit of trouble in the early game due to their power limitations. However, the Mid Laner's kit should often give them enough means to clear waves efficiently or force a stalemate with the opposing Mid. Either way, Mid Laners should prioritize building Items and securing skills that would allow them to clear lanes the fastest.
Never neglect resources. Mid Laners have a challenge of striking the balance between their massive damage and their frailty, meaning players need a workaround to maximize the Mid Laner's presence in the game. In turn, Mid Laners need to find a way to pressure the enemy at Mid via high penetration and high Magical Power. Builds that focus on increasing the mana pool, and better CDR can always help Mid Laners dish more damage before having to retreat.
Throughout the match, Mid Laners need to ensure that their minions clear the other side's to capitalize structure damage. In turn, the skirmishes between Mid Laners often boils down to securing the wave clear the fastest. Doing this can pressure one side as early as possible. Here are other tips:
Focus on the wave clear. Mid Laners need to keep their focus on clearing waves throughout the opening gambit. The faster Mid Laners capitalize on their waves to increase their levels, the more they pose a threat to the enemy. Clearing the first few waves first gives Mid Laners early access to their more powerful abilities.
Box enemies out as much as possible. Thanks to the Mid Laner's high damage and CC potential, they can easily pose a threat to structures with enough wave clears. Mid Laners should do this as much as possible - especially in the midgame. Applying this kind of pressure forces enemies to focus on protecting their structures first. Doing so discourages them from farming, which in turn helps the team's Carry and Jungle to steal buffs.
Capitalize on damage in team fights. Aside from the Carry, Mid Laners boast some of the highest damage numbers in the game. However, their squishy nature makes Mid Laners as prime targets for ganks and high-speed assaults. In turn, Mid Laners in team fights should always stick close to the Support while attacking the most fragile members of the other team.
The Mid Laner should almost always try to get Damage Buff from Manticores (red sword icon). As monsters, Manticores tap into Berserk that triggers when they hit 45-percent health. They get increased attack speed, which can easily spell death for Mid Laners who aren’t careful.
However, the Damage Buff these Manticores easily compensate for the risk of fighting them. Getting the Damage Buff grants the Mid Laner 10-percent increase in overall damage, alongside additional 10 Magical Power and 5 Physical Power. Mid Laners should almost always get these buffs whenever possible. With this buff, the increase in damage output can help them pose a significant threat in Mid Lane, especially in team fights.
Great Mid Laners always have a diverse skillset that focuses on dealing as much damage as possible - be it to a solo target or a group of targets. Aside from their damage focus, Mid Laners often have CC abilities that force enemies to stay on top of things as well. In turn, great Gods that do the Mid Lane justice include:
Zeus: The God of Thunder's base abilities capitalize on fierce burst damage that can eliminate opponents quickly. His Overcharge (Passive) imbues his basic attacks with additional damage. Meanwhile, Chain Lightning (S1), Aegis Assault (S2), and Detonate Charge (S3) can deal massive damage across different groups of enemies. Lastly, Lightning Storm (Ult) gives a devastating damage-over-time element to his build.
Anubis: The Egyptian Lord of the Dead constantly steals protections and better MP life steal scaling with Sorrow (Passive). Moreover, Plague of Locusts (S1) serves as a decent damage-over-time against enemies. Surprisingly, his Mummify (S2) and Grasping Hands (S3) serve as irritating root and stun abilities. Lastly, Death Gaze (Ult) is a mean AOE.
Unlike other Roles, teams depend on Solo to handle their Solo Lane alone as much as possible. Their balanced protections and damage output allow them to square off with opposing Solos without many assistants. Theoretically, their versatile gameplay and damage options also mean they pack a punch in team fights.
Unfortunately, the Solo's versatile nature does mean it can go short on defenses. Sadly, their lack of supreme defenses do make them vulnerable to ganks, and their builds often encourage them to rely on 1-versus-1.
Solo Laners defend the Solo Lane thanks to their mixture of decent attack options and defensive abilities. A lot of Solo Laners often have flexible movement options and have utility abilities designed to up their damage output or boost their protections for short bursts - perfect for duels. Here are other suggestions for the Solo Laner's basic overview:
Skills enable them to become secondary tanks. Thanks to the Solo's versatile skill set, they often come with useful CC abilities that enable them to become secondary Support teammates. Moreover, the melee-focused Solo can also focus on protection-heavy builds that help them become tanks. Essentially, this allows them to rotate to other Lanes to assist like how the Support would.
Be as undisturbed as possible. Due to the nature of the Solo Lane, Solo Laners are expected to face their opposing counterparts quite often. However, players should build their Solos to constantly force stalemates or apply pressure to their enemy. That way, they can properly defend the Lane and slowly advance to the objective without relying too much on team support.
Given the Solo Laner's tendency to become versatile front lines, they often have a confrontation-heavy approach to offense and defense. Here are general guidelines for the entire match:
Focus on the clear, boxing enemy out. Solo Laners should avoid fighting the enemy Solo as soon as the match begins. Rather, they should instead focus on clearing the minion waves as early as possible to secure the level advantage apply pressure to the Lane. That way, the Solo can force their opponent to defend their structures first. Delaying them for a few minutes with this can be more than enough to help the team's Carry and Jungle to steal a few buffs.
Build for counters, ganking. Solo Laners in the midgame should focus on creating builds designed to counter the opponent Solo Laner's approach. For instance, a strong melee opponent can become squishy against Items with strong physical resistance. Moreover, Solo Laners should try builds specifically geared to damage the enemy Solo to encourage ganking with the Jungle.
Prioritize tanking in team fights. By endgame, Solos should have builds that enable them to assist in team fights, especially on the offensive. However, Solos should always consider protecting their Junglers, Carries, and Mids in order to secure damage. Solos should tap into their inner tanks and try to force the enemy focus on them, courtesy of CCs and pressuring them with melee attacks.
Solo Laners don’t have the luxury of constantly going back to base, especially since they are expected not to have much backup. In turn, they need to have as many expendable resources as possible to maintain a threat to the opposing Solo Laner. Thankfully, the Satyrs (blue icons) and their Mana Buffs can help in this regard.
The Satyrs can pack a mean punch as their Summon Spirits ability allows the Satyr to summon up to four spirit assistants in combat. They can deal a lot of damage despite their low HP. However, a Solo Laner who moves around the Satyr can easily fight these spirits off and finish the Satyr. The Mana Buff gives Solo Laners a heal of 20 Mana every five seconds, alongside a 10-percent CD reduction. Moreover, hitting an enemy God with an ability will grant Solo Laners 2-percent of their spent Mana, which incentivizes constantly fighting Gods in Solo Lane.
Players who want to play Solo Laners need to pick Gods who can stand their ground in most skirmishes. Unlike other Gods that often need backup, Solos can duel enemies on their own. As such, great characters for newcomers in this Role have both decent attacks and defensive abilities. These include:
Bellona: This Roman Warrior focuses on buffing herself in the presence of enemies. Her Master of War (Passive) gives her increased movement speed and protections the more she attacks or gets attacked. Shield Bash (S1) and Bludgeon (S2) deals decent frontal and AOE damage around her, incentivizing her active combat presence. Scourge (S3) serves as a decent stun, while Eagle's Rally (Ult) gives her buffs in the middle of combat.
Guan Yu: The fabled Chinese General proves that strategy works in any battle. Painless (Passive) lets Guan Yu receive buffs on his abilities the more he stays in battle. Conviction (S1) lets Guan Yu give healing and buffs to allies, while Warrior's Will (S2) and Taolu Assault (S3) enable Guan Yu to fight enemies head-on. Lastly, Cavalry Charge (Ult) helps Guan Yu travel to distant areas - such as new Lanes - should the need arise.
NEXT: 10 Bad Habits New Players Create When Starting Smite (& How To Avoid Them)

